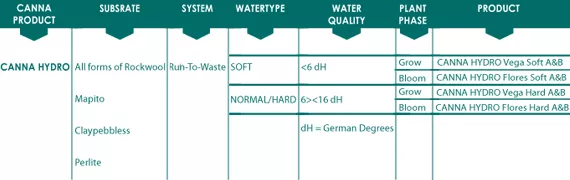
The fertilisers in the CANNA HYDRO range are available in two versions, for hard water and for soft water. If the hardness of your water is 6 dH or more, use the hard water variant. If the hardness of your water is less than 6 dH, then the soft water variant is recommended.
Your local water company will be able to tell you the exact hardness of your tap water. In some areas the quality of the water changes regularly, so if you live in one of these areas it would be wise to purchase your own water testing set. In this way you will ensure that you always start with the best possible materials so that you have an even better chance of achieving top results with a minimum quantity of residual nutrients! This precise balance of nutrients also ensures that the least possible quantity of nutrients is wasted and drains away into the environment. So you see, there are advantages on both sides; a healthy product for the grower and the consumer and the least burden for the environment.
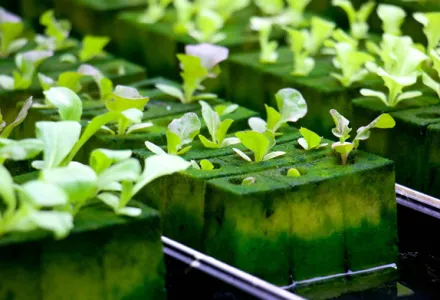
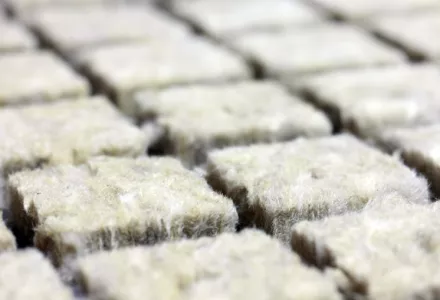
Soaking rock wool before use
Before you put any plants in your new rock wool slab you must ensure that it is thoroughly wet, this process is known as pre-soaking. You should soak your rock wool before use for two reasons:
- To optimise the capillary working of the rock wool. If there are dry patches in the slab these will remain dry during cultivation, and the slab will never reach its theoretical maximum water-retention capacity. And consequently the plants will be less able to absorb sufficient water and nutrients. A chamois works in the same way: when it is bone dry it is difficult to get it properly wet; once it is a little bit wet then it can absorb much more water. Incorrect soaking, or worse still, no pre-soak at all can have disastrous effects: it might even mean that many of your cuttings die within the first few days.
- Secondly, rock wool remains an inert growing medium, it contains nothing to provide a warm welcome for your precious cuttings. By a warm welcome we are referring to the root environment with an EC of about 1.3 and a pH value of 5.6. If rock wool is soaked with ordinary tap water, depending on your water supply, the EC and the pH will be about 0.5 and 7.5 respectively; not really an ideal start for young plants!
We recommend soaking the starting blocks a few days before you soak the slabs; the roots of the plants must have grown through the blocks before you can start with the slabs. So you see that the slabs are only used when the root balls of all the plants are sufficiently developed.
The initial soaking values for the blocks and slabs are the same; an EC of about 1.3 and a pH of about 5.6. In this example the starting point is tap water that has an EC of about 0.5 and a pH value of about 7.3. These values can be determined with pH and EC meters, which are an indispensable aid to growers cultivating on rock wool.
For your pre-soak you will need to make a solution of water with an EC of 1.3 and a low pH – adjust the pH of your soaking solution to 5.1.
NOTE: You will only need to adjust the pH so drastically once!
Next, make a whole in the plastic covering the rock wool slab, just large enough to fit a garden hose through. Attach the garden hose to an immersion pump and fill the rock wool slabs with at least 10 litres of this solution. Leave the solution to stand in the slab for at least 12 hours; preferably 24 to 48 hours.
The EC is fixed, but due to the effect of the water on the rock wool, initially the pH value will drop to about 6.2 only to settle at about 5.8. Rock wool has a continual active influence on the pH value, so it is essential to check it regularly. Now that the slab has soaked for up to 48 hours it’s time to cut a slit in the plastic covering so that the excess water can drain away. Make slits in the bottom of the slab and at the lowest point in the cultivating container.
Continually changing pH in the slab
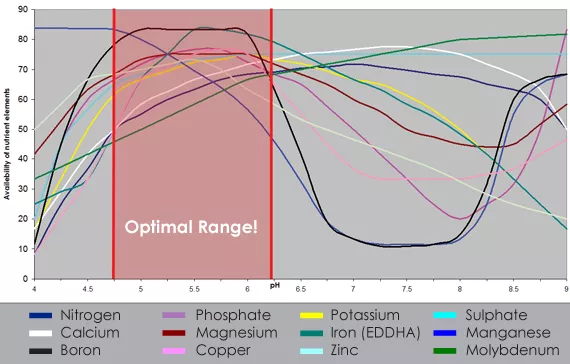
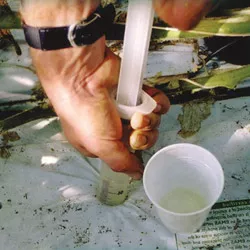
Before you mix up a tank of nutrient always check the EC and pH of the slabs. You can do this quite easily by extracting some nutrient from the slab with a measuring syringe. The pH in the slab will change continually, so you need to check this regularly and take corrective measures when necessary. We recommend maintaining the pH in the nutrient tank between 5.2 and 6.2.
Once the nutrient in the tank is correctly mixed you can start feeding your plants. Water the slab copiously so that about 20% drains away on the underside through the slits you made earlier. Check regularly that sufficient water drains away from the container. If not, increase the amount of water given.
What plant feed should you use at this stage? Well, for the initial phase when the cuttings are still in the starting blocks CANNA has developed CANNA Start to use in combination with CANNA RHIZOTONIC. This forms an ideal basis for starting off seed and cuttings.
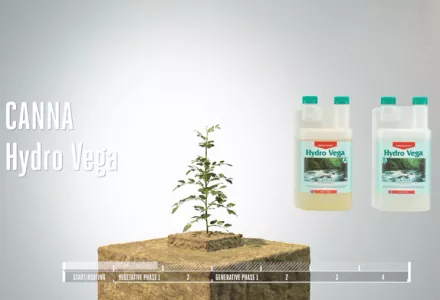
As soon as the plants are placed on the slab, or another growing medium, we recommend using the Vega variant for that grow method, in this case the CANNA Hydro Vega.
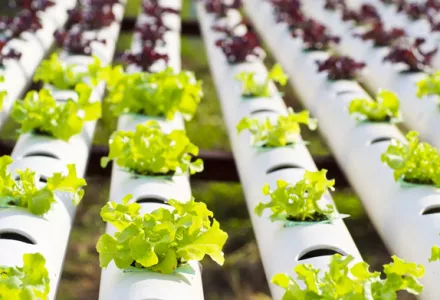
Watering and feeding plants: fertigation systems
Fertigation systems are systems that irrigate the plant with water containing the necessary nutrients. Fertigation comes from the words irrigation and fertilisation, or giving water and fertilisers simultaneously. Irrigation systems are not new; we find narratives of them in the ancient manuscripts. But the practice of adding mineral fertilisers to the irrigation water is only about two hundred years old. There are many different ways of fertigating plants. The most common method used with rock wool slabs is run-to-waste via drippers.
Fertigating via drippers
Sometimes one plant looks poorly compared to the rest. There can be many causes for this, but more often than not the problem is related to one of the drippers releasing a widely differing amount of nutrient solution than the others.
As a result the plant gets either too much or too little water and the amount of nutrients varies too. So it is advisable to check regularly for blocked drippers and inspect them carefully every time you start a new crop.
A good method is to put each dripper into the neck of an empty bottle and switch on the system. After a while check to see that all bottles have more or less the same amount of liquid. In any case, we recommend cleaning the drippers after each crop. What should you use to clean your drippers?
Cleaning your drippers
That will depend on the slaberials they are made from. A simple method to clean your drippers is to add about 250 ml CANNA pH-Grow to 10 litres of water and to rinse the drippers with this solution.
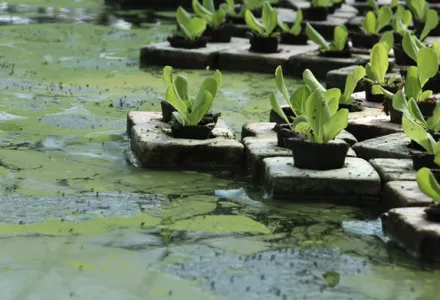
Deposits in the drippers during the grow can be mostly prevented by adding CANNA D-block to the feed water during cultivation. It is also important to prevent algae from growing in the nutrient tank. Algae will also block the drippers. You can prevent algae from growing by eliminating light from the tank, so use a lid.
Capillary drippers are the least accurate of all drippers; plants seldom get the same amount of water. An excellent solution to this problem is to use drippers that only release water at a certain pressure; pressure compensating and self-closing drippers. In this type of system all drippers start irrigating at the same time and all plants get the same amount of feed water. Another advantage is that a system with pressure compensating drippers does not have to be circular, linear systems work well too. These are the most advanced drippers currently available.
Besides capillary drippers and pressure compensating drippers there are also labyrinth drippers. The accuracy of the amount of water released by labyrinth drippers is somewhere between that of capillary drippers and pressure compensating drippers. Just as pressure compensating drippers, labyrinth drippers are also less prone to blockages compared to capillary drippers.
Mixing Hydro nutrients
Half the work is in the preparation. Ensure that you have all the things you will need readily available before you start mixing a tank full of nutrient. Check you have the right fertilisers ready, Vega or Flores, Hard or Soft and an A and B component.
- Fill a clean nutrient tank with tap water, preferably at about 20-22ºC. You can achieve this by running in warm water or by placing a heating element, for example for an aquarium, in the nutrient tank.
- Then, depending on the EC value of the water, add CANNA Hydro A nutrients to the water; stir the solution thoroughly.
- Now measure out exactly the same quantity of CANNA Hydro B nutrients and stir thoroughly again.
- Using an EC meter, check whether the solution contains sufficient nutrient salts. If the EC is too low, add more nutrients. If the EC is too high, add more water. Do this carefully and accurately.
- The first time you do this note the quantities used, equal amounts of A and B dissolved in tap water. This will make a good starting point for the next time!
- Then check the pH using a pH meter, the pH must be between 5.5 and 5.8. If necessary you can increase the pH with CANNA pH+ or CANNA pH+ Pro, and you can lower the pH with CANNA pH- Grow or CANNA pH- Bloom . These supplements are concentrated, so try to get the pH right in one go. Adjusting the pH up or down several times is detrimental to the quality of the feed water!
- Finally we also recommend leaving the freshly mixed nutrient tank to rest before you start to give it to the plants. This pause allows all substances to dissolve evenly and to stabilise.
As the plant gets bigger, it can absorb more nutrients and thus develop even faster. So it is a good idea to increase the amount of nutrients in the water as the plant gets bigger. How much you can give at which stage of the growth is shown in the grow guide below, remember that these amounts are just a guideline. As you become a more experienced grower you can start experimenting to maximise your yield.