Diary of a pumpkin grower

The Grower:
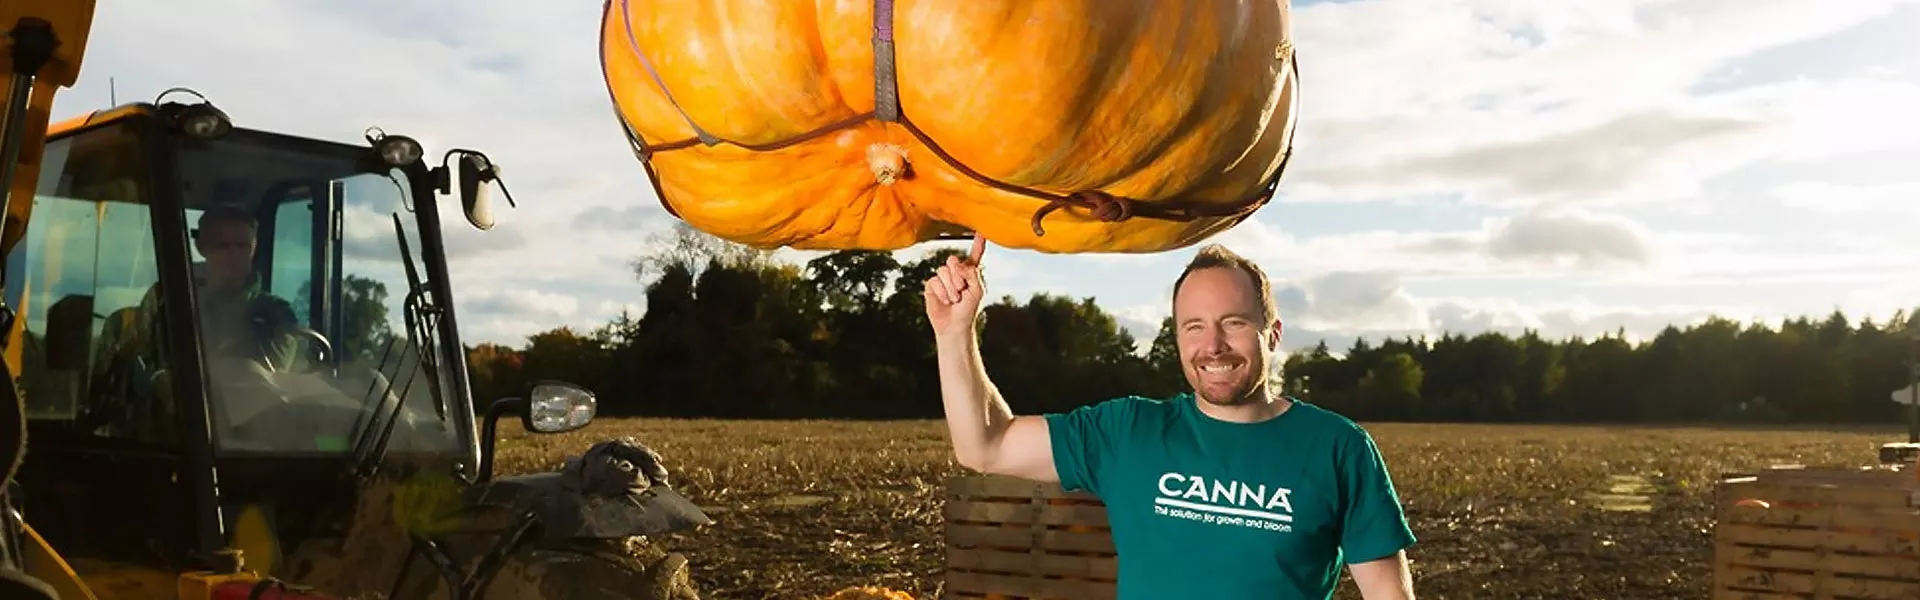
Peter Geyelin is an amateur grower from England with a love of all things orange. After acquiring a significant area of growing space in 2009, Peter grew a vast range or fruit and vegetables for home use. That was until he discovered the mighty Atlantic Giant pumpkin!

Peter has been passionate about pumpkins ever since growing a 224 kg monster pumpkin in 2011 and now he grows little else.

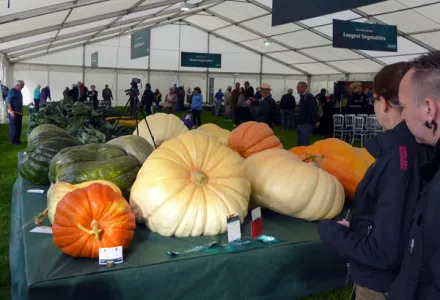
After just 2 years of growing giant pumpkins, Peter won both the coveted 1st place at the York Giant Pumpkin competition in 2013 with a 443.8 kg pumpkin and 3rd place at the Royal Horticulture Society (RHS) in London with a 398.6 kg orange beauty. Peter returned to London in 2014 and won 1st place at the RHS show.

The Project:
As a Chemist by training, Peter's methodical approach and desire to advance his growing techniques in the pursuit of a 500 kg pumpkin and beyond certainly caught our attention!

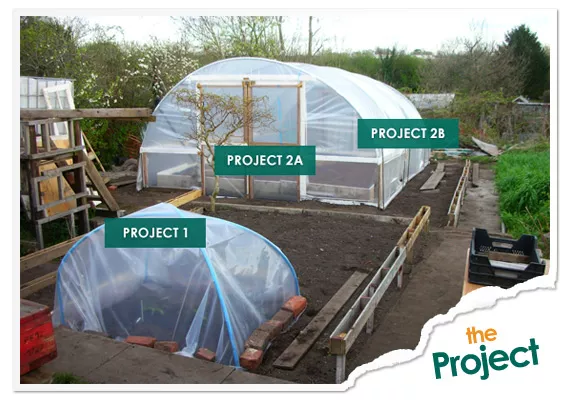
As such, CANNA is delighted to assist Peter to achieve his goal through the CANNA Sponsored Giant Pumpkin Project 2015. For the project, Peter will be growing 3 pumpkin plants:

Project12a2b
Growing medium: Soil Soil CANNA Coco Professional Plus
Location: Outdoor Polytunnel Polytunnel
Patch dimensions: 10' x 15' 16' x 23' 16' x 23'
Root area (sq ft): 150 150 368
Vegetation area (sq ft): 150 150 (Polytunnel) 218 (Outdoor) 150 (Polytunnel) 218 (Outdoor)
Seed: 1738 or 1916 Barron 1626 D. Gantner 1626 D. Gantner
CANNA nutrient: Terra Vega (3-1-4) & Terra Flores (2-2-4) Terra Vega (3-1-4) & Terra Flores (2-2-4) Coco A & B (5-4-3)

To give the project every bit of success, Peter has built a dedicated Polytunnel to house projects 2a and 2b. The CANNA TERRA nutrient line will be used for projects 1 and 2a, which we believe in combination with CANNA additives (RHIZOTONIC, PK 13/14 and CANNABOOST Accelerator) and CANNA Mononutrients, will provide complete nutrition through the vegetative period all the way to the harvest of a 500 kg plus orange pumpkin.

Moreover, we believe that the complex water/air system of CANNA Coco Professional Plus (Project 2b); will provide ideal root zone conditions not present in soil. However, the onus will be on Peter to perfect his growing in Coco but we will be there every step of the way to share our expertise.

FACT: The Atlantic Giant can be grown to gargantuan sizes! The current World Record is 1,054 kg by Beni Meier of Switzerland.

Week 40+: September 28 - ...

Project 2a

From week 40 onwards, time was spent frequently repositioning the pumpkin, keeping it dry and looking for potential splits or cracks in the skin.

As with most things pumpkin related, nothing goes smoothly. Come competition day I was called one hour before the event to check if I was still coming. The penny dropped and my heart sank as I realised I had got my dates mixed up. York Maze were very supportive and offered to give me an extra 1-2 hours to get there.

So, with no time to spare I rounded up a neighbour and his wife and we moved the pumpkin (in the rain) from patch to mini-van. The plan was to document the lift but there was no time so here´s a photo from 2013 to show how they are lifted. The pumpkin is supported by six 1-tonne/2m slings attached to a chain hoist. The tripod was made from 16´ lengths of pressure treated wood joined mounted on a single piece of rebar.

In comparison with previous years, project 2a has resulted with a GOOD result in a bad year. The CANNA Sponsored pumpkin went 16% heavy and took first place at York Maze with a final weight of 672 lbs. Needless to say we will be back in 2016 with a few tweaks here and there to carry out the CANNA Sponsored Giant Pumpkin Project 2016. The project will be getting an upgrade by growing a single plant on 10,000L of CANNA Coco Professional Plus.


Photograph from Jonathan (http://jonathanpow.com)

Week 39: September 21 - September 27

Project 2a

The pumpkin currently measures an estimated 531 lbs lb on day 76 with 29 days remaining until the weigh off. With night time temperatures being single digits growth is starting to tail off

Project 1

The pumpkin currently measures an estimated 221 lbs lb on day 65. Whilst no Giant, it still has 8 days remaining until it is picked for the RHS Giant Pumpkin Competition in London.

As expected from an outdoor grown plant, the entire leaf area of the plant is showing signs of ageing with approximately 20% already died back and a further 35% badly damaged.

Week 38: September 14 - September 20

Project 2a

The pumpkin is up 45 lbs over the last five days and measured an estimated 492 lb on day 68. To keep the pumpkin in a safe position until harvest day (approximately day 105) some manual adjustments were necessary this week.

  1. As the pumpkin continues to add growth over the blossom end, a thick layer of dense foam was placed under the front of the pumpkin to support its weight and prevent it from rolling over.
  2. Tension on the vine/stem was eased by shifting the pumpkin (and board) backwards by approximately 0.2 m.
  3. A hut was created around the pumpkin for added protection. The hut has been covered with plastic sheet (not shown in photo) with one side permanently ventilated.

Project 1

(Next update in week 39)

Week 37: September 7 - September 13

Project 2a

The pumpkin is up 77 lbs for the week and measured an estimated 447 lb on day 63. There has been little to report in the patch this week other than that the pumpkin continues to gradually roll over its blossom end as it grows. The stem and vine are therefore closely monitored for tension. Since the base of this pumpkin is not flat the balance of the pumpkin is also checked as I do have concerns that it may tip over before the season end. Not only would this cause it to tear from the vine, the impact would most likely split it open.

Project 1

The pumpkin is up 25 lbs for the week and measured an estimated 176 lb on day 52.

Week 36: August 31 - September 6

Project 1

By the end of week 36 the pumpkin had crawled along to an estimated 150 lbs at day 45. The aim with project 1 is to keep the pumpkin attached to the plant for as long as possible so as to fully mature the seed within it. Anywhere from day 60 onwards and there will be some viable seed in the pumpkin but germination success will be limited.

Whilst project 1 pumpkin is miniscule in size for a giant pumpkin, the genetic information contained within its seed extends from a line of recent World Record pumpkins (see below). Both the seed to be harvested (1738 Barron x self) and the 1738 Baron seed (used for project 1), have the potential to grow a new world record. However, the limiting factor will always be both grower skill and growing conditions.

For example, let’s consider grower skill: assume two growers in the same location with perfect growing conditions; the skilled grower could potentially achieve a new WR with seed from project 1 pumpkin (200-250 lbs at the end of the season). Conversely, the unskilled grower planting a seed from the WR pumpkin (2323 lbs) will rarely achieve much.

The same comparison can be made with growing conditions. For example, consider two skilled growers growing the same seed but one has poor growing conditions, the other ideal. The potential of the seed in the poor growing conditions will never be realised.

The take home message is that seed does not have to come from the biggest pumpkin to grow a giant pumpkin and this has been proven (e.g. A 1000 lb plus pumpkin has been grown from a seed from a 50 lb pumpkin). However, what is important is to take seed from a proven line and to have both your skills and conditions the best that they can be.


Diagram: Genetic line of 1738 Barron (Project 1 seed)

In week 33 I mentioned that the outer leaves of this plant were oversized (0.7 m in width) and that I did not believe it to be a symptom of excess nitrogen in this case. Following a lesson in plant physiology from Pieter Klaassen (CANNA Research) I am now able to offer an explanation.

Following a lot of rain this summer the soil has been very wet. Therefore the opportunity to apply regular nutrient solution (ca. EC 2.0) has been lost while Mother Nature applied her rainwater liberally (now a lower EC in soil as rainwater EC 0.0). The result of the excess rain is high root pressure and the accompanying high humidity means that the plant is not able to evaporate the water out of the leaves. Therefore a lot of water is pressed into the plant with less water leaving.

This also means that the nutrient concentration in the plant will be reduced (same amount of nutrients dissolved in more water in the plant) which lowers internal EC and makes the vegetative hormones more effective (growth). In the case of project 1 where all the growing tips have been pinched out, it is the existing leaves that are subjected to growth.

Project 2a

As mentioned in week 35, the pumpkin is slowing rolling over its blossom end and therefore stretching the vine with it. Left unchecked the pumpkin would tear itself from the vine.

In the absence of people to assist with a gentle push, a chain hoist strapped to the corner post of the tunnel (it’s strong enough!) enabled the moving to be a one person job. First, the secondary vines closest to the pumpkin were loosened to allow movement. The pumpkin board was then gradually pulled back 8 cm (with purple slings) at a 30o angle to the vine. This action compressed the vine back into a curve and provides flexibility should the pumpkin continue to pull on the vine.

Fertilisation of the plant continues with CANNA Organo Potassium and PK 13/14 (both at 1.5 mL/L) and additives RHIZOTONIC (0.5 mL/L) and CANNABOOST Accelerator (2.0 mL/L). This was accompanied with a foliar feed this week with CANNA Organo Potassium and CANNA Tracemix (1.5 mL/L of each, total of 4L over 430-440 sq ft).

Daily gains were gradually increasing up to 20 lb daily until midweek (Day 52) whereupon the weather cooled. Night time temperatures dropped to between 6-10 oC for the remainder of the week whereupon daily gains dropped to between 5-6 lbs. At the end of week 36, pumpkin 2a taped an estimated 370 lbs on day 56 (+70 lbs for the week).

Project 2b

Besides the continued slow growth, a small rot spot on project 2b pumpkin brought about the end of the project this week. With the cold weather and a limited number of growing days left this summer it is just too late to pursue further pollinations.

In this concluding report for project 2b I thought it relevant to consider a particular statement at the beginning of this diary under the 'Project’ header:

Moreover, we believe that the complex water/air system of CANNA Coco Professional Plus (Project 2b); will provide ideal root zone conditions not present in soil. However, the onus will be on Peter to perfect his growing in Coco but we will be there every step of the way to share our expertise.

So, after exploring the root zone I can firmly say that the coco substrate has definitely lived up to that statement and has far exceeded my expectations.

My findings from exploring the root zone:

1. Coco substrate was heavily matted together (top 8 cm) due to the multitude of fine roots

2. Coco substrate underneath was as light and airy as the day it was added to the bed

3. The coco was far too dry!

4. Tap roots at each node along the main vine were exceptionally long and dense

5. Roots extending from the stump were up to 13’ in length (i.e. reached each border of the bed). (photo show just 2-3 such roots that were excavated, the others were cut)

So, whilst CANNA’s Coco Professional Plus did indeed provide excellent root zone conditions, roots will grow according to need. It is therefore likely that the exceptional display of roots observed were produced in response to under watering (grower error).

From relatively early on guttation was observed with project 2b and I took this as a sign of over watering. However, consider the scenario that the plant was already under watered. Imagine that it then doubles its root mass in response (to seek out water). It is then watered but now the potential water uptake of the plant is doubled. This could result in the observed guttation, but, not due to overwatering but the opposite, under watering!

So indeed, the onus certainly was on me to perfect my growing in Coco and that is a journey to be continued in 2016.

Week 35: August 24 - August 30

Project 2a

To keep the pumpkin growing through the cold nights and cooler days, it has been covered with blankets. Normally the blankets would be removed in the morning to allow the pumpkin to warm in the sun but due to a lack of sun, the blankets have been left on day and night.

This has enabled the daily gains to remain fairly constant with pumpkin 2a finishing the week at an estimated 300 lbs (day 49).

While there is the prospect of keeping a little dignity in the patch with a pumpkin on track for the 500 lb region (see graph 2, end of report), there are however two issues that concern me:

  1. I have noticed that the sand used under the pumpkin (builder’s sand) is holding on to the rain water. This means that the pumpkin is sitting in a wet environment despite there being run-off from the board underneath it. So for now, a temporary cover has been provided to prevent further wetting of the sand (this also keep the blankets dry).

  2. Through grower oversight, the positioning of main vine leading to the pumpkin is not good and therefore there is not much flexibility in either direction for the vine to move as the pumpkin grows. As the pumpkin is growing forwards over its blossom end (as shown below by the black arrow in the picture below) it is therefore pulling the vine with it. Left alone, the pumpkin will continue to grow until it tears itself from the vine. Usually the main vine will be manipulated in an ‘S’ shaped curve up to the pumpkin. The ‘S’ curve acts like a coil in that it can be compacted or stretched according to the direction of growth. In the absence of an ‘S’ curve for project 2a, the pumpkin will need to be moved gradually (i.e. opposite direction to the black arrow).

Project 1

Finishing the week on day 38 at approximately 120 lbs, there is little to be said for this plant and pumpkin other than its peanut like shape. Whilst I am no authority on the cause, I do believe it to be due to growth fluctuations. It is a negative thing and a weakness in the internal wall of the pumpkin.

Project 2b

There is also nothing positive to be said about the growth of this pumpkin either which finished the week at an approximately 26” circumference on day 18.

The collection of a sample of coco for analysis (EC/pH by extraction method) was accompanied by the loss of some pumpkin roots although this was expected since the bed is heavily matted with roots throughout. What I did notice was that the coco is too dry. Prior to week 34, substrate moisture management was good, if not slightly too wet relative to changes in conditions (reduced sunshine and high humidity) and resulting guttation. In week 34 my absence from the patch must have caused some drying back of the coco despite having someone take over the watering for me. So upon my return, watering of the bed served only to wet the top few inches and not penetrating deeper where needed.

Outside of the tunnel is the opposite….too wet, and therefore the pumpkin has been raised off the wet sand onto a board.

Back in the tunnel and the black fly infestation is slowly taking hold of the leaves and is spreading outwards from the stump area. The remaining leaves are perfectly healthy.

Graph 1 - Previous Years Growth

Every year I compile growth data for the pumpkins and plot this in the form of estimated (taped) weight against the age of the pumpkin. The graph below shows such data for 2013 (pink trend lines) and 2014 (turquoise trend lines). So what can we interpret from this data?

  1. Trend lines are grouped together by year – Since all plants for a given year follow the same pattern (albeit with slightly different daily gains and final weights) and since they are all grown outside, we can attribute this to a response to the weather at that time.
  2. 150 square foot patch trend lines are grouped together – This suggests that the size of the growing area (at least in my location) has an influence on the final weight of the pumpkin. Generally, under ideal conditions, the more area that a plant and its roots can occupy the larger the pumpkin. However, amazing results have been achieved by other growers with smaller patches (e.g. 700 lbs in 105 sq ft).

Graph 2 - 2015 Growth

Week 34: August 17 - August 23

Project 2a

As any grower will tell you, when you put in a lot of hours of hard work (for me at dusk and/or dawn) over a sustained period, it can be very disheartening to end a season with nothing to show for your efforts. So, following an 8 day absence from the patch I was pleasantly surprised to find that the pumpkin had not aborted and instead, that a notable increase in growth could be observed. Having previously taped an estimated 109 lbs on day 32, today’s measurement of 209 lbs on day 41 equates to a daily increase from 5 lbs to 11 lbs.

With approximately 60 days remaining until the competition at York Maze, a 500 lb pumpkin is not out of the question.

On day 32 the already dry soil of this plant was watered with just 60 L of nutrient solution and from day 33 – 40 this plant was not watered at all. Upon examining the soil on day 41, the soil was found to be bone dry to a depth of 4 inches. So how do these less than favourable conditions afford 100 lbs of fruit growth over this period?

Following concerns that this plant was still growing vegetatively, the root zone has been allowed to dry back over the last 8 days. This subjects the plant to stressful conditions which in turn triggers a response towards generative growth. However, with this practice there is a fine line between delaying watering for too long and subsequent damage to the plant. Also, when recommencing watering of giant pumpkins following a dry spell, there is always a risk that the resulting surge in growth may cause the pumpkin to split. Therefore, before watering, a number of tertiary vines were pruned from the stump area. This action serves to both lower the resulting root pressure that will shortly be felt and also to increase airflow under the canopy. In addition, since the excess tertiary vines that were pruned were not rooted to the ground, it is possible that they cost the plant more in energy than they provide.

The entire plant area (approx 430 sq ft) was watered today with 200L of plain water amended to pH 5.9 with CANNA pH- Bloom. Given that this plant remains extremely healthy and is in a well amended soil, the only nutrients to be present in the next watering will be CANNA Organo Potassium (to support pumpkin growth) and CANNA Trace Mix. Since over application of potassium can lead to calcium and magnesium deficiencies, the aim is simply to spoon feed potassium (1-2 mL/L) along with supplementary trace elements for correction of any underlying deficiencies. Naturally, the usual additives (RHIZOTONIC and CANNABOOST Accelerator) will not be absent from the nutrient tank.

Project 2b

As expected, the second attempt pumpkin that was pollinated on 3rd August did not take. This has been cut from the plant and a summary follows in the table below.

AttemptPollinatedResult
1 5th July Aborted Culled on 3rd August
2 3rd August Aborted Culled on 23rd August
3 22nd August Ongoing

Having been without an EC probe to monitor the coco substrate directly, I have to date resisted taking a measurement via the extraction method so as not to damage the roots. However, given that there remains a last chance 10 day old pumpkin on this plant (with 60 days of potential growth remaining), the loss of a few roots is a small price to pay for data that could highlight an issue. Therefore a measurement will be taken within the next few days.

Project 1

This pumpkin continues to grow albeit slowly but at Day 30 and with the same nutrient approach as planned for project 2a, I would expect to see a shift over the next week in daily gains.

Should the pumpkin continue to 300-400 lb in weight (or mass to be more precise) then something not noticed in the patch is that the pumpkin will soon grow into the white board that is under the small 10 day old project 2b pumpkin. With project 1 pumpkin taping an estimated 73 lbs (note: 2a was 72.5 lbs on day 28), there is still time to raise it up (with assistance) under a small pallet.

Week 33: August 10 - August 16

Non-project pumpkin

Below is a photograph at another growers patch which captures the ‘summer’ we are experiencing this year. At this stage of the year pumpkins would normally be at around 300 lbs and at peak growth (usually around 35 days old).

The non-project pumpkin can be considered as the control plant in that it is grown outdoors (as per previous plants) and it is not fertilised. It does however have a well amended soil (following a detailed soil test).

I had a hunch for a while (as a result of growth and appearance) that all was not well with this plant and unfortunately I was right. The pumpkin had turned soft and this can be seen when gently pressing against the skin which leaves a depression.

Upon removing the pumpkin I was greeted with a collection of pumpkin roots which have spread approximately 13’ (4 m) from the planting spot. I have no concerns over the rooting of this plant.

Project 1

As can be expected from the growing conditions, project 1 pumpkin is far from growing quickly but it is however growing. However, after two days of clear skies and sunshine followed two days of zero sunshine and heavy rain which is likely to check growth.

An observation made today was that whilst the leaves of this plant are not oversized, the newest leaves (i.e. around the patch edges) are and measure up to 0.7 m in width. Oversized leaves are often a symptom of excess nitrogen but that is not thought to be the reason in this case.

Project 2b

The pollination of the 3rd August may not have taken judging by its growth rate but this might be expected considering it was pollinated on the same day as the previous pumpkin was cut from the plant.

However, another chance presented itself this week with a self pollinated female at the end of the main vine. The main vine was carefully manipulated (always risky) and the little pumpkin now resides in the same location as the previous culled pumpkin.

Project 2a

At 110 lbs (49.5 kg) on day 32 since pollination I am still not totally sure that this fruit is aborting although appearance of the blossom end leads me to believe it is. Every time I see the CANNA banner in the background I realise that despite superb nutrients to hand (and a wealth of experience and knowledge), that getting the growing conditions right can mean the difference between a great year and a poor one.

Week 32: August 3 - August 9

3rd August

Project 2b

As previously mentioned I would over the course of week 31 look upon this pumpkin from afar and notice a darkening of the skin to the left of the blossom end. As a result of camera light compensation such subtleties do not come across very well in photographs but as a grower who looks at these pumpkin every day, every new ridge and bump is subconsciously noted.

Also observed was a subtle shrinking of the skin on the pumpkin which is more pronounced on the ribs of the pumpkin as shown below. On a healthy growing Atlantic Giant pumpkin the skin is uniformly smooth and shiny. With previous experience of pumpkins aborting in 2012 that shared the same characteristics and growth rate I was convinced that this pumpkin was indeed aborting.

Often the decision to take action is made too late. However, with a female flower tied (ready to pollinate) further down the main vine, the decision was made to cut the pumpkin above since it might negatively affect the new pollination with the net result being no pumpkins growing at all.

In seeking confirmation that the correct decision was made, the pumpkin was cut open in search of a reason to justify its removal from the plant. The presence of darkened flesh (circled in red) to a depth of approximately 3” confirmed that the right course of action had been taken.

So, as one story ends, another begins with the pollination of a female on the main vine at ‘approximately’ 19 feet from the stump (planting spot). With 83 days of growth until the weigh off at York Maze, there is still time (weather permitting) for this late pollination to grow to gargantuan proportions.

9th August

Project 2b

With improved weather with respect to cloud/sunshine over the last few days, the new pollination is showing signs of wanting to grow. This is most apparent when comparing the size of the pumpkin on day zero to the raspberry (see below), relative to the difference on day six.

Having recently commented on my disappointment regarding growth this season I was asked if I was disappointed with CANNA nutrients. My first response was a firm no and the reason is two-fold:

  1. Firstly, growing is much more than just a fertiliser and there are many other factors that have to be balanced for success to happen (e.g. including but not limited to light, humidity, water, temperature, carbon dioxide levels). When one or more such factors (i.e. light) are not ideal in the early days of a pumpkins growth then in my experience, the pumpkin never exhibits fast growth.
  2. Secondly, without commenting on individual nutrients/additives, my plants both in and out of the tunnel have never looked so healthy and the root structure in the Coco substrate is exceptional!

However whilst the plants have never looked so healthy there are factors in place that might be steering the plant vegetatively. In an effort to steer towards fruit production the substrate is run a little drier with watering now done in the mornings so as to reduce both root pressure and night time humidity levels (and therefore less guttation). Watering continues to be done by hand so as to have complete control on only watering where needed.

Another action to steer the plant generatively is to abstain from pruning either male or female flowers.

Project 2a

Having watched this pumpkin closely over the course of week 32 and observing the same slow growth (on average 5 lbs a day) and appearance as that of the culled 2b pumpkin, I am confident that this one is aborting.

This is a real shame as all 430 sq ft of plant is extremely healthy and yet there are no more female flowers available. Signs that this plant is maintaining in the vegetative stage (despite terminating all vines) is the abundance of growth originating from the stump of the plant.

Project 1

While this pumpkin got off to a late and slow start, it looks good and at 17 days old is young enough to respond to the improved weather of the last few days.

Week 31: July 27 - August 2

2nd August

The weather has proven to be the limiting factor this season and week 31 has been one of waiting for the clouds to disperse and the sun to come out. On reflection on 2014 I recall that although the pumpkins were on track, a cold August checked growth significantly. The 2015 season has featured a ‘very’ poor July resulting in the smallest pumpkin measurements to date. However, 60-80 days of good weather is still possible and with it the potential for good growth.

Project 1

Looking upon the leaf canopy of project 1 today I considered the effect of reduced sunshine on the plant. With both its large area of vegetation above ground and extensive root mass below ground, the plant requires a given amount of energy to sustain itself. Any surplus energy can then be used for fruit production (i.e. a pumpkin). With good weather, the leaves photosynthesise efficiently and there is likely to be surplus energy to fuel pumpkin growth. Conversely, in poor weather the mass of vegetation becomes a burden as photosynthesis drops dramatically and with it a diminished plant capability to grow a large pumpkin. There is an ongoing debate in the giant pumpkin growing community as to the perfect patch size (ranges from 400-900 sq ft per plant) which in my opinion, partly depends on how local climate affects the plants balancing of energy to sustain itself and energy for pumpkin growth.

Project 1 pumpkin currently has a circumference of 13” on day 10 (pictured below) and therefore it is questionable as to whether the pollination took. Growth of the pumpkin over the next 10 days will determine the fate of this project.

Project 2a

This plant currently has approximately 430 sq ft of vegetation and two things have been done this week in order to steer the plant generatively and establish the pumpkin as the sole energy sink.

  1. CANNA PK13/14 introduced
  2. All vegetative growing tips terminated

Nutrient tank: CANNA Flores (7 mL/L), RHIZOTONIC (0.5 mL/L), CANNABOOST (2 mL/L) and PK13/14 (1.5 mL/L) – (EC 2.2, pH 5.8).

However, inspection of the stump area of this plant suggests otherwise (see below) as both 2a and 2b (and plant 1 to a lesser degree) show an abundance of growth which I have not observed before. A normal looking plant stump is shown by non-project plant 3 (ignoring the abundance of weeds). A discussion of this observation will follow in week 32.

Project 2b

The growth curve for this pumpkin (which can be blamed on the weather) combined with some subtle differences in its appearance give cause for concern in terms of it aborting. Whilst such subtleties do not come across very well in photographs, there is an area to the left of the blossom nub that is turning duller and the skin in places does not have an even sheen or tightness.

Week 30: July 20 - July 26

23rd July

Project 1

Following the setback that arose from snapping the female off the main vine, this project is finally ready to start producing following this morning’s pollination (1738 Barron x self). Two female flowers on adjacent secondary vines opened in my absence a few days ago. Both pumpkins were removed from the plant in favour of a pumpkin placed on the main vine. Failure or success now rests firmly on this little pumpkin. All vines have been terminated on this 150 sq ft patch.

Project 2a

The plant is doing great with leaf area at 100% of the original allocated space (368 sq ft). However, the plant is going to be allowed to grow to 440 sq ft before all vines are terminated. The aim is to have a plant with every leaf node rooted so as to reduce energy required for plant maintenance, thereby increasing the available energy for pumpkin growth.

Whilst the pumpkin is not breaking any records so far with a circumference of 18.5“at 10 DAP (days after pollination), it is still relatively early. However, quality sunlight is needed for this summer has been very cloudy to date. There is an open pollinated female and an unopened female remaining on the vine. These will be culled from the plant once it is evident that the pumpkin wants to grow. As shown in the photo below, the used 10L CANNA nutrient containers are extremely useful for supporting the main vine either side of the pumpkin.

Project 2b

Of the three projects, this coco based plant offers the most feedback (via its leaves) regarding its environment. As previously mentioned, guttation exudate that is produced overnight (under high root pressure) contains sugars, salts and other plant related compounds. Upon evaporation of the water, these compounds remain on the leaf as a white film and this in turn leads to guttation burn around the edges of the leaves. Care is taken to read both weather and plant with regards to how much to water and when so as to limit guttation.

Following a lot of hard work to get to this stage there is nothing better than a jungle of pumpkin leaves with a pumpkin starting to rise above the leaf canopy. The pumpkin is currently 18 days old and will soon need a new form of shelter erecting. This one promises to be orange!

24th July

The forecast for the next four days is that of copious amounts of rain and a very low UV index. Despite being equipped with more knowledge and experience this year, and having well established plants and a well cared for root system, good pumpkin growth just isn’t going to happen unless there is adequate sunlight. But there is hope and the weather can change quickly.

26th July

Project 2a

The Project 2a (soil) pumpkin (pictured below) is currently 14 days old with a circumference of 25”, which is a little behind but expected with the lack of sun. However the benefit of growing in the tunnel is that I am able to control the moisture content of the soil. The plant can cope with the current cold conditions but cold and wet soil is not ideal. With a change in the weather everything is well placed for good growth. All but two vines have been terminated, the plant occupies an area of approximately 420 sq ft and approximately 90% of vine nodes have been buried to facilitate secondary rooting. There is little else for the plant to focus on other than to producing a pumpkin.

Project 2b

There are a total of three stem splits on this pumpkin and all appear to have stopped. Keeping the stem dry and dusted with sulphur powder (fungicide) has prevented rot.

The pumpkin is currently 21 days old and has grown only 10.5” over the last two days. To put this into perspective, the pumpkin should be growing 10.5” or more per day. Pumpkin growth is initially monitored by measuring the circumference but a more reliable method once the pumpkin is large enough is the ‘over the top’ method (OTT). This involved combining three measurements;

  • cc (circumference): at the widest point, typically around stem to blossom and parallel with the ground
  • ss (side to side): straight up from the ground over the pumpkin at the highest point and down the ground.
  • fb (front to back): straight up from the ground over the pumpkin at the highest point and down the ground.

So, on day 21, project 2b pumpkin had an OTT measurement of 115.5” (45.5”, 35.5”, 34.5”).

Week 29: July 13 - July 19

14th July

Project 2b

A constant theme through this diary is one of poor weather and complaints of it. As such, through a combination of two days of low quality sunlight, high humidity and high root pressure; the characteristic widespread white residue which results from guttation was observed on the leaves. Whilst I am unable to control the sunlight that will both hasten drying of the substrate and increase transpiration, I can however take steps to reduce the relative humidity in the tunnel.

Therefore all side curtains were permanently removed to lower humidity and increase air flow. Half a dozen secondary vines were also terminated since they had stretched over the patch boundary. This action also serves to reduce root pressure under the current damp conditions.

Following the last two wet days, mould was observed on and around the blossom end of the pumpkin. This arose from the damp environment that was inadvertently created following a protective basket with a white sheet on it being placed around the fruit. The white sheet remained wet over the 48 hour period which combined with warm temperatures, provided the perfect conditions for mould to take hold.

The mould was removed, the blossom nub was cut off and all parts were dusted liberally with sulfur powder. The basket and sheet were taken away and the pumpkin was provided with shade in the form of a large table over the top. By taking swift action, the mould was removed thus preventing its rapid spread which would ultimately lead to loss of the pumpkin.

Watering continues with Coco A/B (8 mL/L), Rhizotonic (0.5 mL/L) and CANNABOOST (2 mL/L) (pH 5.9, EC 4.1)

Project 2a

With the wet weather, the previous damage caused to the vine (longitudinal split) is causing concern. To prevent water from running down the vine to the damaged area, a leaf was removed either side of the split and the vine was raised (and supported) to keep it horizontal. The damaged area was dusted with sulphur and then a pane of glass over the top (but not touching).

  • The plant is approximately 300 sq ft in size
  • Watering continues with CANNA Terra Flores (7 mL/L), Rhizotonic (0.5 mL/L) and CANNABOOST (2 mL/L) (pH 5.8, EC 2.0)

15th July

Project 1

Project 1 is almost at full capacity and is just waiting for a pumpkin to be set. This plant is being watered with Terra Flores (8 mL/L) and Rhizotonic (0.5 mL/L) but CANNABOOST is not being used. Nutrient solution EC and pH are 2.0 and 5.8, respectively.

Project 2b

Whilst the pumpkin on this plant is not currently breaking any records, there are cracks developing in the stem of the pumpkin. There is another on this stem and both run pretty close to the pumpkin. Such splits tend to be superficial but every so often one will continue to split into the pumpkin and breach the cavity.

In the first 15-20 days, pumpkin growth is monitored by its circumference at the widest point. This involves running a tape measure horizontally around the pumpkin from stem end to blossom end.

17th July

Project 2a

Additional Note:

Revised (anticipated) patch sizes:

  • 2a: 440 sq ft (22’ wide x 20’ long)
  • 2b: 352 sq ft (22’ wide x 16’ long)

Week 28: July 6 - July 12

9th July

Following the pollination of project 2b plant on Sunday there has been very little sunshine which does not bode well for a good start for a developing pumpkin. The combination of high rainfall, cool temperatures and virtually no sun (over the last three days) has resulted in a noticeable decline in vegetative growth on all plants and has also delayed the opening of a female flower on project 2a plant.

An additional problem is the availability of male flowers for pollination. Having previously removed many flowers not thought to be needed, I have inadvertently affected the availability of flowers for later pollinations, most importantly that of project 2a (expected to be tomorrow).

As a precaution, several male flowers due to open today were picked, placed in water and stored in the fridge. There are accounts of this practice being used with success but ultimately, fresh pollen would be preferred.

As a precaution, the saved flowers (above) will be removed from the fridge tomorrow morning and kept in a warm room for approximately one hour to ensure the pollen is dry.

11th July

Project 2a

Two days later and the desired female on the main vine of project 2a is still ‘on the verge’ of opening.

  • The plant is approximately 300 sq ft in size
  • Watering continues by hand with just Rhizotonic (0.5 mL/L, pH 5.8, EC 0.5)
  • Slug pellets have been scattered around the female flower

Project 2b

With the pollinated female being just outside the tunnel, the pumpkin has been positioned carefully to allow maximum space for a pumpkin with a potential circumference of 13’ and larger.

An important task in the early days of growth is to ensure that the stem and blossom ends of the pumpkin are horizontal. To leave it anything but for too long and the pumpkin will set its course which could result in growing over its blossom or back on its stem, both with inherent problems.

The pumpkin is covered with a white sheet to protect it from the sun. Upon removing the sheet a few days ago I found a snail taking refuge. Upon close inspection of the pumpkin I soon realised that the snail was just stopping by for dinner.

At 6 DAP (days after pollination) the tennis ball sized pumpkin is smaller than I would like. However, the first three days following pollination were without sunshine.

  • The plant is approximately 228 sq ft in size
  • Watering continues by hand with CANNA Coco A & B (8 mL/L), Rhizotonic (0.5 mL/L) and CANNABOOST Accelerator (2 mL/L) (pH 5.9, EC 4.1)
  • Slug pellets have been scattered around the female flower

Project 1

We take many steps to protect our pumpkins but what protects them from the grower? As a result of the main vine growing out and the female flower being stretched along, there was a need to reposition the board underneath it. In doing so I managed to snap the small pumpkin (whose flower would have opened soon) off the vine. The world stopped turning momentarily as I cursed myself and estimated the extent of this setback.

Since the main vine does not have much available space ahead it was terminated just after a very small female flower in the tip (white circle). All new unopened growth on the main vine tip (i.e. small leaves) was removed and fertilisation was changed to CANNA Terra Flores (2-2-4). The plant is now just pushing four secondary vines, two of which have female flowers in the tips (orange circles). All three pumpkins will be pollinated providing there are male flowers available. The other two secondary vines will be swept around the patch (as shown by the white lines) to fill the remaining space.

  • The plant is approximately 105 sq ft in size.
  • Watering today by soaker hose with CANNA Terra Flores (7 mL/L) and Rhizotonic (0.5 mL/L) (pH 5.8, EC 2.0)

12th July

Project 2a

Pollinated: 1626 D. Gantner x 1738 Barron (i.e. project 2a x project 1) at 17 feet (5.18 m). With almost 300 sq feet of plant behind this small pumpkin, the main vine was terminated just after two additional females 40 cm further along the vine.

No matter how thorough a job of pruning you do there is always one that you missed or didn’t quite pinch out completely. To date I have kept on top of weeding but attempts to remove any now would likely cause more harm than good (e.g. broken leaves, compaction of soil).

Project 2a

A layer of sand was placed under the pumpkin this morning. The reasons are two-fold; to provide drainage to protect the bottom of the pumpkin and to facilitate the pumpkin moving as it increases in size.

Week 27: June 29 - July 5

30th June

Today marked an unofficial 1st day of summer with clear skies and a high of 28 oC. Anticipating that the plants would most likely be wilting due to the heat, I visited the patch at midday when the sun was at its strongest. Indeed, I found soil based plants 1 and 2a exhibiting significant wilting whereas coco based 2b exhibited little and another soil based plant (non-project) exhibited none.

Project 1 and 2a plants, respectively

To reduce such heat stress it is usual for those in hot climates (not usually the UK) to mist their plants for short bursts throughout periods when the plants leaves are likely to wilt. By misting the leaves at short intervals we are able to reduce heat stress through evaporative cooling. Short bursts of misting also ensure that while we are wetting the leaves, we are not saturating the root zone.

Both project 1 and 2a plants were misted for 30 seconds then left for a few minutes whereupon recovery was observed as shown in the photograph below.

Sun shelter was provided over the main vine tip of project 2a and 2b plants to keep the female flowers protected. However, with such intense sun it is advisable to protect all new growth which would include leaves at least 40 cm back from the growing tip of every vine.

2nd July

Indeed, many of the young leaves near the vine tips of Project 2b plant were damaged. As the plant continues to grow, the leaves with their increased size will become vey congested and therefore approximately ten damaged leaves were removed. Ones such as below were kept.

July 5th

This week has probably marked one of the busiest weeks in the season with two hours an evening in the patch barely being enough to keep on top of activities. I have been measuring and reporting a rapidly increasing main vine length. However, behind the main vine growing tip of every plant is on average an additional ten sets of secondary vines. This equates to approximately over 80 growing tips to manage, each of which produces up to 15 cm of new growth daily. This needs to be pruned, pinned down and covered at the nodes to facilitate secondary rooting. This is in addition to the hand watering of every plant. This year I made a conscious decision to reduce the number of plants I grow. I would recommend to new entrants into this hobby, to consider the time you are able to allocate to each plant. Plan to be able to spend an hour per day on each plant for the duration of its growth. To grow too many plants reduces the level of care, leads to more unruly plants and ultimately, smaller pumpkins.

Project 2b

Even with practice it still remains a guessing game as to when a female flower will open, however this time I got it right. Having selected a female at approximately 13 feet out along the main vine, I gently tied the petals of the flower with string (on the evening of the 4th July) to prevent it from opening the next day and being deemed an open pollination.

The next morning, if you have timed it well, you will see a puckered flower tip (as shown in the photograph below). When tying up the female flower, male flowers (pollinators) that were due to open the same morning were also tied up. This protects the integrity of the flowers pollen from insects and ensures it is a controlled pollination.

The pollination is carried out by stripping the male flowers of their petals to expose the pollen coated stamen. The female is untied and the pollen from each male stamen is gently rubbed on the female. The female is then tied back up for 24 hours where after the petals are gently removed to allow airflow.

Plant 2b was pollinated with three male flowers from plant 2a. Since both plants are from the same seed line (1626 D. Gantner) this is known as a sibling cross (1626 x sibb).

Despite having soaker hoses laid in each patch, watering of all plants continues to be by hand. The main reason for this is that the coco bed does not dry uniformly as a result of differing root density across the bed. But this is a good thing as rather than apply water everywhere as has previously been my bad practice, it is far better to apply according to only where needed.

For project 2b which is now in the generative growth stage, CANNABOOST Accelerator was introduced into the schedule today. Since solutions containing this additive should be used within four days of being prepared, 100-120 L batches will be prepared at any one time. The main feed containing CANNA Coco A/B at 8 mL/L and RHIZOTONIC (0.5 mL/L) is decanted from the 1000 L stock solution into a smaller tub whereupon it is mixed with CANNABOOST (2 mL/L). The final EC and pH are 4.1 and 5.8, respectively. This smaller tank is covered with a thick white sheet to keep it cool (around 18-22 oC) since higher temperatures affect the volume of dissolved oxygen in the nutrient solution.

Project 2a

Well, the goal was to amass a large plant and that is being achieved. With the female flower just shy of 17 feet on the main, there will be the option to extend the plant size to 400 square feet before terminating all growth.

The glass cover over the main vine serves to protect a damaged section of main vine from rain. Through grower error, the main vine was squashed, resulting with a 10-15 cm crack along the length of the vine. This was dusted with sulphur powder and should heal just fine providing it is kept dry.

Project 1

At approximately 90 square feet in volume and with a female flower in the growing tip, project 1 plant is 60% of its final size (more if we consider the leaf area lost to the pumpkin). Approximately 2 hours were spent pruning, pinning and installing 45 m of new soaker hose. The challenge was not just in the laying of the hose but doing so by making it run under the vines (whilst not compacting the soil and damaging roots or leaves). A board was placed where the pumpkin is anticipated to grow. The board is supported by smaller wooden beams to enable the soaker hose to pass underneath so as not to create a dry spot in the root zone.

Summary Data

Growth data with respect to the main vine length

Pollinations

ProjectMon 29thThurs 2ndSun 5th
1 3.17 m (+0.21) 3.58 m (+0.41) 3.88 m (+0.30)
2a 4.44 m (+0.18) 4.89 m (+0.45) 5.24 m (+0.35)
2b 4.07 m (+0.21) 4.45 m (+0.38) 4.70 m (+0.35)

Project 2b (coco): 1626 D. Gantner x sibb (2b x 2a) at 3.94 m on Sunday 5th July.

Week 26: June 22 - June 28

27th June

Project 2b

80-100 L of nutrient solution was applied on the 21st June via gravity fed soaker hoses connected to a 1000 L tank. Through a combination of overwatering and cloudy weather, the bed stayed wet all week and a green fungal film had developed in patches. Due to the high moisture level in the substrate (and therefore high root pressure) the leaves have been showing signs of guttation (exudation of xylem sap in the form of droplets on the edge of the leaves). This occurs over night when transpiration is suppressed and is detectable through droplets on the edges of the leaves in the morning or in the afternoon by a white residue on the leaf edges.

To combat this, a side curtain was removed to improve circulation and lower humidity, and higher EC (nutrient solution) was required along with a drier substrate. Therefore, after allowing the substrate to dry over the past six days, watering resumed today after increasing EC from 2.6 to 3.6 with respect to CANNA Coco A/B and Rhizotonic. Despite overwatering on the 21st and the light coloured leaves (both new and old) throughout the plant, growth towards the end of this week has been comparable with 2a and the leaves are starting to deepen in colour.

The plant has filled approximately 80% of its 150 sq. ft. (13.9 m2) bed with both the main vine and some of the first secondary vines extending from the tunnel. The vine is essentially the lifeline of the pumpkin and therefore a piece of foam was placed underneath to protect it from damage from the wooden edging.

Project 2a

Through a combination of improved growing conditions (i.e. in a tunnel) and regular feeding with CANNA Terra Vega and Rhizotonic, growth has far exceeding any plant I have grown in previous years. In addition, the plant looks very healthy with rich green but not oversized leaves (that result from too much nitrogen).

The female flower originally selected for pollination was pinched off the main vine in order to delay pollination. The rationale is to have a larger plant at pollination time to support a fast growing pumpkin since once the generative period kicks in it is usual for vegetative growth to cease until later on in the season. There is currently a very small female flower in the tip and with good weather it should be pollinated no later than 10th July. For comparison both my 978 lb and 874 lb pumpkins grown in 2013 were pollinated on the 10th July, albeit on smaller plants.

Project 1

The 496 lb pumpkin grown in this patch in 2014 was pollinated on the 15th July, so again I am not overly worried about a pollination date. The plant is now establishing nicely and growth of the main vine is comparable with project 2a and 2b plants. Due to this patch being open to the elements, it is not watered as frequently with CANNA nutrients purely due to the fact that there has been sufficient rain fall.

Summary Data

Growth data with respect to the main vine length

ProjectSun 21stTues 23rdThurs 25thSat 27th
1 2.38 m 2.50 m (+0.12) 2.71 m (+0.20) 2.96 m (+0.25)
2a 3.60 m 3.76 m (+0.16) 4.00 m (+0.24) 4.26 m (+0.26)
2b 3.30 m 3.40 m (+0.10) 3.62 m (+0.22) 3.86 m (+0.24)

Week 25: June 15 - June 21

15th June

Project 1

Every year there’s an increasing list of things to do differently and weeding around the plants is high on that list. Weeding within the root zone is carried out by cutting the weeds at ground level with a very sharp scalpel. The weeds are never pulled as this would disturb and damage roots of the pumpkin plant.

18th June

Project 2a

The approximate time frame (in this growing location) from the appearance of a female flower to it opening for pollination is about 10 days, following which the resulting pumpkin will on average grow for 90-110 days. Therefore, with one eye on the calendar with a view to 90 days of growth falling within the best of the summers weather (i.e. July – September), the dilemma is whether to set a fruit early (by July 1st) or later with a bigger plant (i.e. July 8th). At approximately 27% of its anticipated size with a leaf area of 105 sq ft, the hope is to amass a large plant prior to pollination so as to be able to terminate secondary vines and set up a single energy sink (i.e. maximum energy into production of a single fruit). Ultimately, the plants growth and its production of viable female flowers will determine the course of action.

As a result of both 2a and 2b plant tips reaching out of the tunnel at their respective ends, the final door has been removed giving a 3.3 m2 opening at each end of the tunnel. The tunnel will soon have additional ventilation when the side curtains are raised to allow for the secondary vines to extend from the tunnel.

Fertilisation of 2a was adjusted today from 4.6 to 5.5 mL/L with respect to CANNA Terra Vega. Rhizotonic is still added at 2.0 mL/L and the nutrient solution was amended to pH 5.8 giving a final EC of 1.8 (EC+ 1.3).

Project 2b

Due to the rapid spread of plant 2b, the walk board was removed. Care is being taken to make sure all tertiary vine tips are terminated as access to the bed to remove them later will be very difficult without damage to leaves or compaction of the root zone.

19th June

The limited access to the patches as a result of the spreading plants necessitated a shift from hand watering to use of a gravity fed soaker system.

However, in 2014 a reoccurring issue of the soaker hoses blocking was experienced as a result of algae from the nutrient tanks being left exposed to the sunlight.

For 2015 an improvement was sought so that light would be excluded from the tanks but not only to prevent algae formation but also to prevent degradation of the iron chelates in the nutrient solution due to UV light. In addition, the exclusion of sunlight would prevent overheating of the nutrient solution and a subsequent reduction in dissolved oxygen.

Two IBC tanks were filled with water then covered with old king-size duvet covers. One had an additional cover in the form of an old lined curtain. Light transmission was measured with a sensor placed inside the covers.

21st June

Project 1

With the plant set 2’ into a 15’ long patch, there remains 13’ of the patch with which to home a 4-5’ diameter pumpkin at a typical distance of 12’ down the main vine. To fit the pumpkin within the patch boundary (competition rule) the main vine needs to be manipulated by creating a large curve.

Project 2a

With a main vine measuring just under 12’ in length (3.60 m) and with 8 sets of secondary vines establishing inside the tunnel, it is anticipated that the small female flower in the growing tip of project 2a plant will be a keeper and likely to be pollinated in the first week of July. This should give ample time for the plant to fill in size since many of its secondary vines are almost out of the tunnel.

Whilst actively pruning and vine burying (well, not actually burying but mounding soil over the nodes) I remembered from previous seasons that there is a pattern with which the male flowers on the secondary vines open and this is in relation to their age. With most of these not likely to open for some weeks I realised that to keep them would be a waste of the plants energy. With a good number of males flowers left for pollination, I am now pruning off new male flowers (sorry bees) in new growth (along with the usual tendrils and tertiary vines).

The initial plan was to roll the sides of the tunnel up to allow the secondary vines to extend out of the tunnel. However, rather than roll the sides of the curtains up and reduce the favourable conditions inside the tunnel, small windows were cut in the curtain for the secondary vines to extend out. Should additional ventilation be needed then this can also be cut into the curtain. At the end of season the windows will either be taped back into position or the curtain replaced.

With pollination of the female likely in 10-12 days, only one more application of CANNA Vega will be needed as fertilisation needs to be stopped at least one week either side of pollination. Therefore the soaker hoses for project 2a have not been brought in to play as the 1000 L IBC tank will need setting up with CANNA Flores.

Project 2b

At 11’ in length (3.30 m) and just slightly smaller than project 2a plant, this plant also has a small female flower in the growing tip which will be kept for now but potentially pruned in favour of developing more plant first. With project 2b plant there was the issue with the bed being a good 5-6” below the bed edging. To enable the vines to extend out of the tunnel, large grooves were cut into the sides.

A 1000 L tank of nutrient solution was prepared and fertilisation of 2b was adjusted today from 4.0 to 4.5 mL/L with respect to CANNA Coco A/B. RHIZOTONIC was added at 2.0 mL/L and the nutrient solution was amended to pH 5.7 giving a final EC of 2.8 (EC+ 2.3). Further nutrient solution preparations for project 2b will be done so at a rate of 0.5 mL/L with respect to RHIZOTONIC.

Summary Data

Growth data with respect to the main vine length

ProjectMon 15thWed 17thFri 19thSun 21st
1 1.77 m (+0.12) 2.02 m (+0.25) not recorded 2.38 m (+0.36)
2a 2.91 m (+0.19) 3.12 m (+0.21) 3.43 m (+0.31) 3.60 m (+0.27)
2b 2.67 m (+0.23) 2.88 m (+0.21) 3.11 m (+0.23) 3.30 m (+0.19)

Week 24: June 8 - June 14

9th June

Project 1

Having outgrown its hoop house at a time when the weather was cold, this plant has slowly been acclimatising and has settled in. Given that both root and vegetation of this plant is limited to only 150 sq. ft., there is no rush for this one to fill its space. Some of the earlier leaves are a little damaged but will be replaced with new ones growing from the stump area. The emphasis will be on keeping the plant and its leaves healthy and that means limiting foliar sprays and keeping the root zone happy by not overwatering. The cover crop has now been cut down to ground level and will be left for a few days before being turned over.

By way of reminder, the aim of this project is to exceed previous year’s results and CANNA nutrients will be the driver to making that happen. The overriding rule of the competition is that the entire pumpkin and vegetation must be within an area of 150 sq. ft.

YearResult
2013 427 lbs
2014 496 lbs
2015 Target: 500 - 600 lbs

Project 2a

This plant continues to stretch out with good primary and secondary vine growth. Soaker hoses which will be gravity fed from a 1000 L tank, are now being added to the patch ahead of the secondary vine growth to avoid laying the hoses over the vines. This plant will need to have a set of hoses either side of the plant since the main vine has already been covered with soil at each node. The photograph below shows hoses extending to a distance of 7 feet. However, since root spread will extend beyond this, I will need to raise the sides of the tunnel and dig in the cover crop so that the hoses can be laid to cover the full width of the patch (i.e. 11.5 feet either side of the plant).

10th June

Project 2b

This plant is establishing very well and the main focus remains on maintaining ideal moisture in the substrate. The highest points in the Coco are the mounds covering the nodes and these tend to dry very quickly. The photograph below shows the upper root that emerges from the vine. It was detected after watering which could have rinsed the coco off. The root, which prefers to be in the dark, was covered with additional fresh damp Coco.

13th June

Project 2b

This young man has a vested interest in the coco based plant and has been helping with vine burying.

We decided not to mound over further nodes of the main vine since it would need to be raised 15-20 cm to be able to extend out of the bed. So, the plan is to create a Coco ramp with which the vine can travel up. This will allow more nodes of the main vine to be rooted in the substrate.

We continue to prune out unwanted female flowers, tendrils and tertiary vines as early as possible so as not to waste plant energy. No matter how thorough a job I feel I have done, there is always one tertiary vine that escapes only to reveal itself in August once it is 1-2 m in length (and sometimes with a football sized pumpkin on the end).

When manipulating vines they can either snap or kink if moved too much in one go and particularly when cold (e.g. in the morning). Despite knowing better, I managed to kink the first secondary of project 2b plant.

Project 2a

It is often the case that we use a product but are unable to pin point an improvement due to it. However, the companion tomato plants in the corners of the tunnel have been fed with the same CANNA Terra Vega/RHIZOTONIC solution that is used on the pumpkin plant. On weeding around the tomatoes, roots first thought to be pumpkin roots due their appearance and size, were exposed. These turned out to be the most developed tomato roots I have observed and without a doubt a result of the RHIZOTONIC additive (2 mL/L) in the nutrient solution.

Project 1

The red circle in the photograph shows an area liberated through the removal of a worn and damaged leaf. With constant heavy rain over the last 24 hours and with more to come, a cover was fashioned out of an ice cream tub to provide some protection of the growth split on the stump.

The effect of the growing environment is evident when comparing the growth (see table below) of outdoor grown project 1 plant with project 2 plants grown in the Polytunnel. Such is the challenge of growing outdoors in the UK with reduced temperatures and excess rainfall, with the latter of detriment to the root zone.

Summary Data

Growth data with respect to the main vine length

ProjectSun 7thTues 9thThurs 11thSat 13th
1 1.28 m 1.43 m (+0.15) 1.54 m (+0.11) 1.65 m (+0.11)
2a 2.13 m 2.34 m (+0.21) 2.54 m (+0.20) 2.72 m (+0.18)
2b 1.80 m 1.96 m (+0.16) 2.28 m (+0.32) 2.44 m (+0.16)

Week 23: June 1 - June 7

3rd June

With the plants now vining I have been pinning down the main vine (with 5 mm canes) and mounding soil/coco over the vine at the leaf node. Particular care is taken not to bury the emerging secondary vine or male flowers. The new vines that emerge from each node are termed ‘Secondary vines’ and are trained at right angles to the main/primary vine (as shown for project 2a plant below). It is very important when training the secondary vines to only move them a little at a time if there is resistance and only to move them at the end of the day when they are warm. When moved in the morning when they are cold they snap very easily!

Each node on the secondary vine will also produce a tendril, secondary roots above and below the vine, a male flower and a vine (tertiary vine). These tertiary vines are pinched out as soon as possible. To grow them would not only produce a very congested plant with poor air flow under canopy but would waste plant energy thus detracting from the goal of growing a giant pumpkin. The flowers emerging from the secondary vines are kept for pollination. Once again, soil (coco for 2b) is mounded over each node of the secondary vines in order to facilitate secondary rooting.

5th June

The rye/vetch cover crop on project 1 is now being cut down and then segments are cut to an approximate depth of 10” then turned over. As the patch has not been walked on, the light soil has not been compacted and the soil structure created by the roots is preserved and offers the roots of the pumpkin plant a nice light and airy environment. The decomposing foliage of the cover crop, now in the sub layer of the soil, will of course tie up some nitrogen while it decomposes only for it to become available later on in the plants cycle once the tap roots reach such depths. Supplemental nitrogen is available however through regular feeding with CANNA Vega and can be applied as necessary.

7th June

Following two days away from the patch there has only been time this evening for watering project plants 2a and 2b. The entire coco bed of 2b was very dry and has been watered with 80 L of Coco A/B and Rhizotonic (EC: 2.6) at an approximate rate of 6 L/m2. Both 2a and 2b have responded well to the sunny weather of the past few days and are producing good sets of secondary vines. Weeks 24 and 25 promise to be very exciting in terms of growth and it is anticipated that pollination might occur in week 26.

Summary Data

Growth data with respect to the main vine length

ProjectSun 31stTues 2ndThurs 4th
1 0.85 (+0.08) 0.95 (+0.10) 1.09 (+0.14)
2a 1.35 (+0.16) 1.55 (+0.20) 1.78 (+0.23)
2b 1.06 (+0.19) 1.22 (+0.16) 1.50 (+0.28)

Week 22: May 25 - May 31

27th May

The observed root spread of project 2b plant in the coco bed has far exceeded expectations. As a result, fertilisation with Coco A/B and Rhizotonic solution is now being applied over a significantly larger surface area (approximately 8-9 m2 at a rate of 5 L per m2) as shown in the picture (remaining area is watered with plain water at pH 5.9). For comparison, the current area of watering of soil based plant of project 2a is approximately 2 m2 around the plant.

Project 1

Having outgrown its 1 m2 hoop house (now removed) the 1738 Barron plant is approximately 10 days ahead of last year’s plant grown in this patch. To safeguard the plant against damage, a wind barrier was erected and 5 mm canes were inserted into the soil on both sides of the main vine.

Project 2a

The 1626 D. Gantner plant of project 2a continues to be the patch leader and its main vine is now firmly down on the soil bed.

At every node where a leaf extends from the vine, the plant produces a tendril, a male flower (source of pollen to pollinate the female flower that will become the pumpkin), a secondary vine and secondary rooting above and below the node. To encourage secondary rooting and ensure that air pruning does not take place, the vine is pinned to the soil bed with 5 mm canes and soil is mounded over the vine at the lead node. However, mounding will not take place until the secondary vine is sufficiently long so as not to be buried.

With the volume of data being recorded (e.g. daily temps/humidity, nutrient data and plant measurements etc), keeping it accurate but simple is a necessity. A whiteboard works for me, a quick photograph and it’s pinged away to my computer.

31st May

Project 1

With this plant no longer being grown under cover the soil temperature has dropped and remained over the last 3 days at 15 0C. As a result, growth is slower than that of its counterparts (2a and 2b). Whilst measuring the length of the plant a split was found at the stump. Such splits (as shown by the red arrow) are typical of a fast growing plant and tend to be superficial and heal over. A secondary crack is shown by the blue arrow. As a precautionary measure as a result of rain in the patch over the last few days, the stump was dried and dusted with sulphur powder (fungicide).

Project 2a

This plant continues to be the leader in the patch and sits at 1.35 m in length. A tap root was detected under one of the leaf nodes and therefore no time was wasted in pinning the vine to the soil with canes and mounding soil over the vine at each node. Later on in the season when secondary rooting at the nodes is established, the soil will be washed off so as to reduce the chance of the vine rotting.

Project 2b

Nutrient solution for the 1626 D Gantner in the coco bed was increased on the 30th May (from 3 mL/L to 4 mL/L with respect to Coco A/B) giving a new EC of 2.6. As the plants in the tunnel are rapidly increasing in volume, automated irrigation will be needed shortly to liberate time for other duties in the patch. Gravity fed soaker hoses were inspected and repaired and approximately 50 m of a continuous line was laid down in the coco bed with an approximate spacing of 25 cm.

Summary Data

Spray Programme for soil based plants 1 and 2a

 MondayWednesdayFriday
Product CANNA Magnesium
(MgO, 7%)
CANNA Calcium
(CaO, 15%)
CANNA RHIZOTONIC
Concentration 1 mL/L 0.6 mL/L 4 mL/L
Volume used 50 mL 50 mL 50 mL
pH/EC 7.0 / 0.9 7.0 / 0.9 7.0 / 0.68
EC+ 0.4 0.4 0.18

Spray Programme for Coco based plant 2b

 Friday
Product CANNA RHIZOTONIC
Concentration 4 mL/L
Volume used 50 mL
pH/EC 7.0 / 0.68
EC+ 0.18

Growth data with respect to plant length

ProjectMon 25thWed 27thFri 29thSun 31st
1 ---- 0.68 m 0.77 m (+0.09) 0.85 (+0.08)
2a 0.85 m 1.00 m (+0.15) 1.19 m (+0.19) 1.35 (+0.16)
2b 0.57 m 0.71 m (+0.14) 0.87 m (+0.16) 1.06 (+0.19)

Week 21: May 18 - May 24

Project 1

There was little difference between the two plants of this project and therefore the keeper was chosen from the more orange parent pumpkin (1738 Barron). The 1916 was removed by cutting the stem at ground level.

Project 2a and 2b

The marginally more developed but better positioned 2aL was kept. Walk boards are used to prevent compaction. In the Coco bed, the significantly more developed 2bR was kept.

24th May

Whilst there has been warm weather this week, the cloudy weather and limited amount of sunlight is thought to be the reason for the relatively slow growth of the plants this week. However, both project 2a (soil) and 2b (coco) plants have produced a small main vine which is about to touch down.

Plant 2b decided to shoot its main vine 45 degrees in the wrong direction and was gently manipulated into the desired position and held in place with metal wire (one side hooked over a leaf stem, the other positioned into the stem of the removed plant). The coco substrate continues to impress with the excellent spread of roots and as such the application of nutrient solution is required for approximate 4 m2 area around the plant.

Week 20: May 11 - May 17

12th May

The application of calcium nitrate to 3 out of 4 plants (project 1 and one of a pair of non-project plants, loosely known as project 3) on the 10th May, was followed by two days of warm sunny weather. In direct comparison to the project 3 plant that did not receive calcium nitrate, the other three plants showed subtle signs of distress which suggests too high an EC of the calcium nitrate solution for the young roots.

Project 1 plants will recover very quickly but a lesson learnt in that ‘less is more’ and nutrient EC needs to be raised slowly in line with the maturity and requirements of the plant.

For example, at the end of the season when the patches are cleared, huge thick fibrous roots can be pulled from the patch and yet these start out as small delicate white roots. A good analogy to appreciating young and mature roots is that of human skin. Infant skin for example is different from adult skin in structure and composition and has limited tolerance to say heat and substances. Just as the skin matures and changes over time, so do the roots along with their tolerance to increased EC levels.

As all plants are getting very close to the vining stage, the nutrient solutions have been changed accordingly as of today (plant 2aL pictured).

ProjectWeek 18Week 19Week 20
1 and 2a
(Soil)
3.7 mL/L Terra Vega
2.0 mL/L Rhizotonic
pH 5.9, EC: 1.45, T= 20.0oC
3.7 mL/L Terra Vega
2.0 mL/L Rhizotonic
pH 5.9, EC: 1.45, T= 20.0oC
4.6 mL/L Terra Vega
2.0 mL/L Rhizotonic
pH 5.9, EC: 1.6, T= 22.4oC
2b
(Coco)
2.3 mL/L Coco A
2.3 mL/L Coco B
2.0 mL/L Rhizotonic
pH 5.8, EC: 1.8, T= 20.0oC
2.3 mL/L Coco A
2.3 mL/L Coco B
2.0 mL/L Rhizotonic
pH 5.8, EC: 1.8, T= 20.0oC
3.0 mL/L Coco A
3.0 mL/L Coco B
2.0 mL/L Rhizotonic
pH 5.8, EC: 2.1, T= 23.0oC

The nutrient solutions are prepared one day before being used whereupon pH is rechecked and adjusted as necessary. The nutrient solution is also shaded from daylight (as UV light breaks down iron chelate in the nutrient)

Nutrient solutions are prepared by first recording both pH and EC of the water to make sure nothing is changing there. Rhizotonic is first added with which a raise in pH is observed. Coco A and Coco B are then added sequentially with thorough mixing in between. Finally the pH is corrected with CANNA pH-. The same procedure is followed for soil based nutrient solution preparation (i.e. RHIZOTONIC > Terra Vega > pH-).

14th May

Project 1

The cover crop is establishing very quickly and continues to be watered once a week with nutrient solution (in week 20: 4.6 mL/L Vega, 2.0 mL/L RHIZOTONIC).

Project 2b

With the current warm weather and thus elevated temperature in the tunnel (30-40 oC), moisture in the 14 m2 Coco bed continues to be maintained 2-3 times a week with plain water (40-50 L per watering) amended to pH 5.9. I continue to ‘walk the plank’ by means of access to both the plants and the entire bed.

Project 2a

Soil moisture and watering is determined by feeling down into the soil. To limit weed seed germination the patch is kept dry except for soil in proximity of the root zone. Typically 5 L of nutrient solution will be applied around both plants as shown below.

15th May

Contrary to forecasted weather, today was warmer than usual and the absence of wind created a dangerously high maximum temperature in the tunnel (47.3 oC). Fortunately only one leaf from the four plants in the tunnel, showed damage with wilted edges. The period of time at this temperature is unknown, as is whether the leaf will recover or not.

Whilst all plants were already scheduled for foliar treatment today with Rhizotonic solution, it is expected to be particularly beneficial for plant 2aL since Rhizotonic when applied in this way, aids the recovery of plants that have been subject to stress and damage or are in general poor health. Each plant was lightly misted (both sides of the leaves) with 50 mL of RHIZOTONIC solution (4 mL/L, pH 7.0, EC 0.68).

16th May

As a result of continued cloud/sunny weather and the multiple days in which maximum temperatures have been over 40oC in the tunnel, the new protocol for days in which sun is forecast, both doors at the West end of the tunnel will be opened. When no wind is forecast an additional door will be opened on the East side. The green netting is to prevent feral cats from using the coco bed as a giant litter tray.

Project 2a

It was expected that the damaged leaf on plant 2aL (orange arrow) would not recover from the heat damage but indeed it did. Perhaps it will age quicker than the others but time will tell. Plant 2aL continues to be the plant of choice for keeping. This is due both to its larger developing vine (blue arrow) over 2aR and also due to the positioning of plant. Typically, the leaf indicated with a white arrow is loosely termed as a ‘kick stand’ in that it often props the plant up thereby preventing the main vine from laying down on the ground. This requires the grower to either manipulate the plant or in some cases, completely remove the leaf stem. Plant 2aL is well orientated for the vine to extend straight out on the soil.

Project 2b

Since the entire Coco bed is enclosed with black plastic, 30 cm lengths of tubing were placed in the bed as a means of observing the bottom in the case of overwatering. Upon scooping out a small hole at a distance of 70 cm from the plant base (2bR), a white pumpkin root at a depth of 13 cm was severed. Typically with soil based plants I would not have expected to see a root extend this far from the plant this early. Watering of nutrient solution will now need to extend out to a minimum of 1 m from the plants, perhaps more. The moisture content of the coco was deemed perfect and was consistent all the way down to the bottom.

Week 19: May 4 - May 10

6th May

At present we continue to have very cloudy weather with intermittent sun which presents a challenge in managing temperature in the tunnel. The weather is also very windy (24 mph, 35 mph gusts) which presents issues with the safe venting of the tunnel (Projects 2a and 2b).

I am currently refraining from EC and pH analysis of the coco via the extraction method as this has already resulted in the loss of some small roots when taken at 12 cm distance from the plant (2bL). However, I do not feel that monitoring of these two parameters is critical at this stage in the plants growth of which there is little difference so far between the projects.

Observable differences will likely become apparent as the requirements of the plants change (e.g. at vining and generative stages). That said, there is already an observable difference in vigour between the plants within a project for 2a and 2b. At present, 2aL and 2bR look to be potential 'keepers' although there is much time for that to change.

The 1:1 mixture of rye/vetch sown on the end 100 sq feet (10’ x 10’) of Project 1 has germinated and was watered with 10 L of nutrient solution (EC: 1.45, pH: 5.9 [3.7 mL/L Vega, 2.0 mL/L Rhizotonic]) containing 1 tsp of soluble mycorrhizae (Plant Success Great White).

7th May

Ian Paton (UK record holder, 1884 lbs in 2014) has documented the effective use of calcium nitrate as early as the current stage in the plants cycle, and with good results. Ian applies calcium nitrate by foliar addition with an EC of 1.3 and to the root zone at an EC of 2.3.

By way of experiment, the weakest plant per project (1738 Barron, 2aR and 2bL) was used to study the effects of foliar treatment with a solution of calcium nitrate (1g/L, EC: 0.8, pH: 5.9) in distilled water (EC: 0.04).

9th May

With advice from Pieter, future spraying of leaves will be carried out with pH neutral nutrient solution so as not to damage the leaves. No damage was observed on this occasion following the use of calcium nitrate at pH 5.9.

10th May

No observable difference was observed from the foliar addition of calcium nitrate on the test plant of each project and therefore an effect was sought from addition to the root zone. Project 1 plants were watered with 2L each of calcium nitrate solution (in distilled water) with an EC of 1.8 (pH 6.0).

Nb. Projects 1 and 2a were subject to some light weeding around the plants.

Week 18: April 27 - May 3

There has been relatively little to report this week. Daily actions continue with uncovering the pumpkin plants in the morning, opening up the tunnels and then closing up at the end of the day.

Night time temperatures have been very cold (e.g. –2.5 oC) and therefore all plants are being covered first with a basket and then with a domestic fleece blanket. The morning temperatures outside at the time of opening the tunnels have been in the region of 6 oC with temperatures rising to between 11-13 oC outside and 37-41 oC in the tunnel (27-29 oC for project 1). The week has been very cloudy with intermittent periods of sun.

Ideally temperature in the tunnel at each hour would be good to know and even better to be able to open up the tunnels when needed rather than wait for the sun which is unpredictable under the cloudy conditions. However, the growing location does not offer ideal conditions so we manage the best we can. A research team able to control both day time and evening temperatures will be well placed to providing optimum grow conditions ;)

The nutrient solutions for the projects are currently in 120 L blue drums. These are covered from the sun and kept in the 2a side of the tunnel. The temperatures of the solutions have been between 18oC to 21oC (morning/evening) which enables application whenever needed.

Project 1

The latter 3/5 of patch has had a 1:1 mix of grazing rye/vetch sown. Once germinated, the cover crop will be inoculated with Mycorrhizae and will be tilled in just ahead of root growth of the final plant.

Project 2

The same cover crop has been sown but only around the borders of the Polytunnel. There is no plan to inoculate this crop which is there simply for both the health of the soil and as a preventative measure against weeds.

At present there is not a great deal of difference in growth between the plants except that project 1 leaves are fractionally larger and 2bL is slightly behind with respect to the developing 2nd true leaf.

The photographs’ above show a difference in leaf colour between soil based and coco based plants. Upon checking in the patch this can only be attributed to contrast and the camera. Project 1 however, does have the typical light coloured leaves that are observed with AG’s due to reduced nitrogen uptake in cold and wet conditions.

Below is a representative example (plant 2bR) of current leaf sizes:

Week 17: April 20 - April 26

20th April

Today’s min/max temperature recording (0.5 and 45.4 oC) in the tunnel for projects 2a and 2b highlighted the need for better care to prevent such extremes. One door was opened today (2a side), two doors (one at opposite ends) will be opened tomorrow to reduce the maximum temperature and improve circulation.

To address the minimum temperature, projects 2a and 2b were covered (at 19.17 hrs) with available materials: horticultural fleece (2a) and bubble wrap (1 and 2b). Whilst bubble wrap will provide slightly more insulation than fleece, it will however prevent air reaching the plant and will therefore be removed as early as possible.

Project 2b

The coco was deemed too dry to test EC and therefore each plant was watered with 2 L of nutrient solution containing Rhizotonic and Coco A/B (pH: 5.7, EC: 1.2 at 20.5 oC). I am currently shooting for an EC+ of between 0.9 - 1.1 (0.7 - 0.9 for 1a and 2a) as per the CANNA grow guide for ‘Normal’ feeding

Soil temperatures after one day of sunny weather:

ProjectTemperature (oC at depth of 15 cm)
1 18
2a, 2b 18
3 18

22nd April

Having experienced a very dry month prior to planting and with the current warm weather and thus elevated temperatures in the tunnel/hoop house, the soil of 1 and 2a are relatively dry. With all projects I am currently trying to maintain ideal moisture content in the soil and learn how to manage the watering of coco.

At present I am checking the moisture in both the soil and coco patches by feeling down into each. This method is okay at present as I have a good idea of approximate root spread from the plant. However, once the plant establishes itself, this method will be detrimental to the root structure.

Current aim is to sink some clear perforated Perspex tubes into the bed at various points.

To date I have been using freshly distilled water (pH 7.0, EC: 0.05) due to the absence of water at the growing location. As this is not viable for large volumes of water and due to the fact that the water supply was turned on today, I will shortly be switching to mains water at the patch. This has not been tested ‘yet’ but is ‘assumed’ to have an approximate pH of 7.8 and EC of 0.5).

  • Photographs taken prior to watering.
  • Now that the first true leaf has opened with the correct orientation, the direction of the vine will be opposite to that of the leaf.

26th April

This week has very much been a case of nursing the plants with the routine of opening up the tunnel/hoop house in the morning, watering in the evening (when needed) and covering up the plants (to protect against frost) and finally, closing up the tunnel/hoop house. As a result, there has not been a significant amount of ‘time in the patch’.

Today I was at the patch for the duration of the day and noticed that the 45.5 oC temperature in the tunnel did not feel like 45.5 oC. Upon moving the thermometer the temperature dropped to 36.1 oC, upon which it was concluded that the thermometer was also measuring heat radiating from the wood behind the sensor. Therefore, temperatures and humidity readings for week 17 (except 26th) are invalid although the minimum temperature readings should not have been affected significantly.

Good ventilation throughout the tunnel was observed through the joins in the side curtains. It is expected that lower 2a patch (soil) will experience more air flow than the higher 2b (Coco) as a result of the high edging of the latter. The entire coco bed surface is being sprayed lightly to counter the drying from evaporation. The top two inches are being maintained at the same moisture consistency as the lower level.

Today a project ending frost was experienced with temperature in the tunnel dropping to -2.5 oC.

However, all plants were adequately protected the evening before:

The plants:

Week 16: April 13 - April 19

15th April

By midday all project seeds had emerged from the potting medium whereupon the heat mat was turned off. Plants were then watered with a solution of Rhizotonic (80 ml of 4ml/L in distilled water, pH: 5.7, EC: 0.14)

16th April

19th April

Growth over the last five days is typical of the Atlantic Giant although due to the conditions (heated greenhouse, maximum daylight) the project plants are the ‘strongest’ to date in such a short period of time. I have been particularly impressed with the 1626 D. Gantner seed (Projects 2a and 2b) which are marginally ahead in terms of seedling size and root mass.

The tunnel cover was completed (i.e. doors and curtains) today albeit one week behind schedule as a result of personal injury (on 5th April). At the time of installing the main cover of the tunnel (13th April) a small hoop house was erected on a non project pumpkin patch (which will loosely be known as Project 3). The one week delay appears to have cost a 3oC in soil temperature.

ProjectTunnel/Hoop house completedTemperature (oC at depth of 15 cm)
1 19/4 14
2a, 2b 13/4 - main cover
19/4 - sides and doors
15
3 13/4 18

Ideally the soil would be allowed to warm before transplanting, however, a) there is no guarantee of sun and b) the plants have outgrown their pots and the roots need to spread into the soil/coco of the patches.

Project 1

Plants were planted 1’ apart (space limitation of patch) and will be reduced to the strongest plant once the leaf area becomes too crowded. Ideally, further apart would allow a longer time to detect an issue with a plant. When one of the plants is culled it will be cut at ground level. The plants were planted at a 30-40o angle to reduce future stress on the vine as it lies down.

Project 2a

100 L of compost was spread and turned into the 3’x 3’planting area. Again, due to space limitation, the plants were set 2’ into the patch. The arrow shows the eventual direction that the vine will grow.

Project 2b

Bed filled with 4900 L of Coco Professional Plus, 100 L retained for covering vine nodes.

Week 15: April 6 - April 12

10th April

1. Seeds were filed gently on 100 grit sandpaper (only the sides are filed gently).

Seed started:

6 x 1626 D. Gantner 2014 (Projects 2a and 2b)
1 x 1738 Barron 2014 and 1916 Barron 2014 (Project 1)

2. Filed seeds were soaked for 8 hours in cooled (28oC) boiled water whereupon they were placed between damp cotton wool pads (First soaked then all water squeezed out). Cotton wool pads are used so that the radical does not get trapped in the fibres. The pads were placed in plastic bags and kept at 28oC for 24 hours at which point all seed had germinated (0.5 - 1.5 cm radical observed).

11th April

Seeds were transferred to 2.5 L pots of damp seed starting compost then watered with soluble mycorrhizae (50 ml, Plant Success Great White, 1 tsp in 1 L of mineral water). Pots were then placed on a heat mat in a thermostat controlled greenhouse (max. soil temperature recorded: 29oC). No supplemental light, daylight only.